
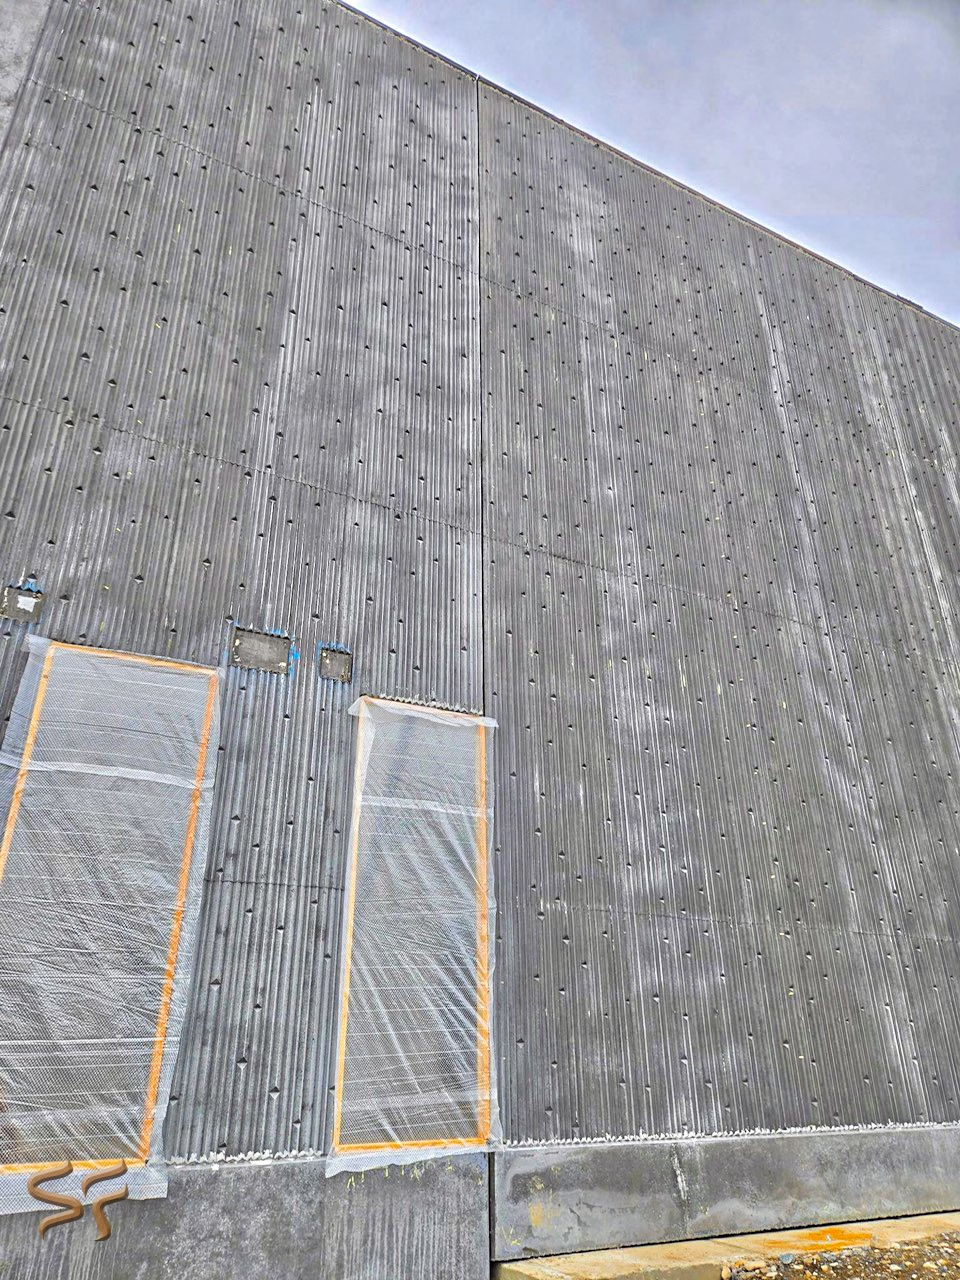
Over 10,000 tilt-up buildings are constructed in the United States every year, collectively enclosing more than 650 million square feet. Spring and early summer drive the majority of that volume — and for contractors planning their panel pours, the formliner decision is one of the first material calls on the critical path. Get it right in planning, and the rest of execution goes smoothly. Delay that order, and schedule pressure from liner lead time becomes the problem nobody budgeted for.
Why Tilt-Up and Single-Use Formliners Go Together
Tilt-up panels are the archetype job for single-use plastic formliners — and not by accident. The horizontal casting process, the one-time-per-panel layout requirement, and the extensive field cutting each project demands all point to the same material solution: lightweight, field-cuttable, single-use styrene plastic.
Understanding why requires a look at what makes tilt-up fundamentally different from precast or cast-in-place wall work. On a tilt-up project, every panel typically carries a unique combination of dimensions, blockouts, door and window openings, embed positions, and lifting insert locations. Consequently, no two panels are usually laid out exactly the same way — and crews must cut and configure the formliner to fit each panel individually.
The One-Use Reality of Tilt-Up Work
Unlike precast production runs or cast-in-place retaining wall programs, tilt-up panels offer no meaningful opportunity to reuse a formliner between pours. Each panel gets stripped, tilted, and removed from the casting slab before the next panel occupies the same space. Moreover, the configuration of the next panel is almost always different from the previous one. Paying for 25-use reuse capacity on a material you'll use once is simply money left on the slab.
Single-use styrene formliners eliminate that cost mismatch entirely. Furthermore, they offer two properties that specifically suit horizontal tilt-up casting: extreme lightweight (approximately 0.4 lbs per square foot, compared to roughly 6 lbs for elastomeric liners), and easy field cutting with standard utility knives or shears. Both properties matter enormously when a crew is laying liner across thousands of square feet of casting slab in a single session.
Because tilt-up panels are horizontal pours, gravity holds the formliner against the casting slab during concrete placement. Mechanical fastening needs are minimal compared to vertical cast-in-place applications where the liner must resist hydrostatic pressure. As a result, single-use styrene liners — which lack the structural backing of elastomeric systems — perform reliably in the tilt-up environment.
The SpecVac System: Built for Tilt-Up Work
Spec Formliners' SpecVac single-use formliner line is manufactured from High Impact Polystyrene (HIPS) using a vacuum-forming process. The result is a lightweight, rigid plastic liner that produces clean, consistent concrete texture at a cost basis that makes sense for one-time-use tilt-up applications.
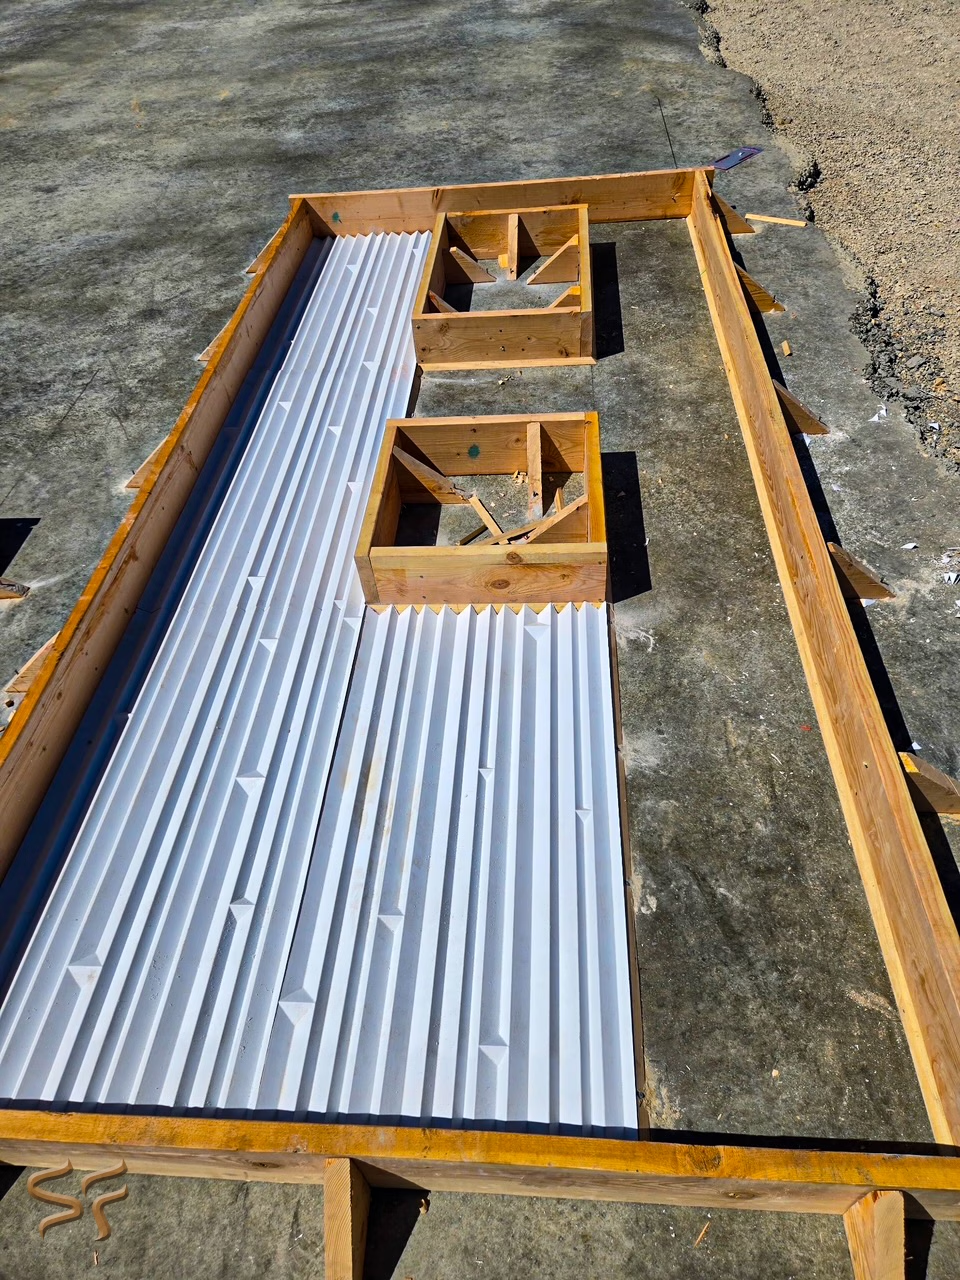
What SpecVac Delivers That Tilt-Up Projects Need
SpecVac is the right call when every panel requires unique cutting and layout. However, some tilt-up projects feature a high number of identical repeating panels — the same dimensions, the same blockout configuration, the same embed positions. In that scenario, upgrading to Spec Formliners' SpecVac Multi (2–10 uses) can reduce total liner cost over the run. Contact our team before ordering and we'll help you run the math.
Slab and Surface Prep: What Has to Be Right Before Liner Goes Down
Formliner performance in tilt-up work depends heavily on the quality of the casting slab beneath it. Any imperfection in the slab surface — waviness, contamination, uneven flatness — transfers directly to the face of the panel. Therefore, slab prep is not a background task: it directly affects finished panel quality and the ease of the eventual lift.
Bond Breaker Application and Timing
Bond breaker goes on the casting slab surface before the formliner and the rebar mat. This chemical release agent prevents the freshly poured panel from bonding permanently to the floor slab, enabling a clean crane lift. However, bond breaker application is temperature-sensitive in ways that tilt-up crews often underestimate.
In warmer conditions, bond breaker absorbs more deeply into the slab surface, which means the job may require additional coats to achieve a complete film. Conversely, cooler or wet conditions require adjusting application timing to ensure the product dries fully before liner placement begins. Correct application produces a dry-soap feel uniformly apparent to the touch across the treated surface. By contrast, a grease-like feel signals over-application — which can cause panel surface discoloration and interfere with subsequent paint adhesion.
Slab Flatness and Liner Seating
Tilt-up panels are cast face-down against the slab, meaning the casting slab surface becomes the finished panel face. Accordingly, any high spot, low spot, or surface contamination on the slab creates a corresponding defect on the panel. Before liner layout begins, walk the entire casting area and mark any problem zones for remediation.
The formliner must seat fully against the slab without bridging over low spots or lifting at edges. Because SpecVac liners are rigid rather than flexible, they don't conform to slab irregularities the way an elastomeric liner might. Therefore, slab flatness standards matter more on tilt-up projects than on vertical cast-in-place work where the form provides its own support plane.
Field Cutting and Fitting: The Core Skill in Tilt-Up Formliner Work
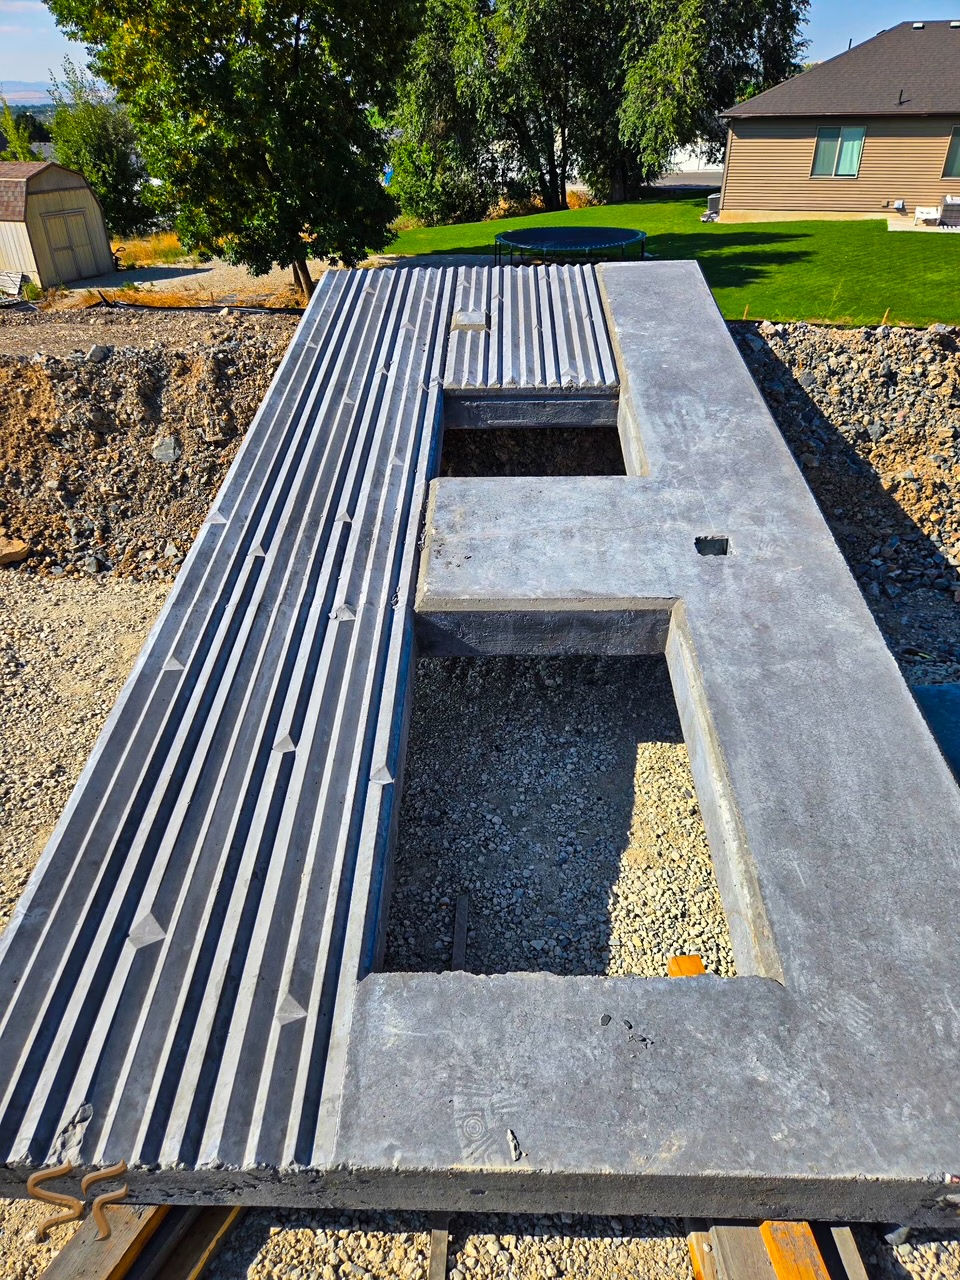
Field cutting is where single-use styrene earns its place in tilt-up work. The ability to cut, score, trim, and modify the liner on the slab — with tools every crew already has on site — compresses layout time significantly compared to working with materials that require shop fabrication for every modification.
Cutting Tools and Technique
A sharp utility knife handles most straight cuts and curved modifications cleanly. For longer straight cuts, a circular saw with a fine-tooth carbide blade makes faster work of full-sheet trimming. Tin snips work well for trimming pattern edges, particularly on ribbed and fluted profiles where the liner thickness varies across the profile geometry.
One important note: trimmed HIPS edges turn sharp. Crews should wear gloves during cutting and handling to prevent injuries during layout. Additionally, plan cut sequences before breaking out liner from the shipping stack — working from a marked layout diagram reduces waste and prevents short-cutting errors that require additional material.
Fitting Around Blockouts, Embeds, and Panel Edges
Most of the field cutting on a tilt-up project happens at the intersections between the liner and the panel's structural elements: door and window blockouts, lifting insert plates, electrical conduit embeds, and panel edge forms. Each intersection requires precise notching or trimming so the liner seats flush without gaps at the boundaries.
Gaps between the liner and blockout forms allow concrete bleedwater to seep underneath, creating surface discoloration and finish inconsistency on the panel face. Consequently, take time to fit each cut edge cleanly against blockout forms and seal all gaps with silicone caulking before the rebar mat goes in.
Furthermore, close off any open-ended pattern profiles at panel edges. Use foam tape grout seal blocks or silicone applied directly into the open cavity. Either approach prevents localized bleedwater loss that discolors the adjacent surface.
On projects where multiple adjacent panels will be visible together after erection, pattern alignment at panel joints matters. Plan your liner layout so the pattern continues across the reveal or rustication joint between panels rather than interrupting randomly. Reveals or rustications at butted joints are recommended to cover the seamline — however, planning the liner layout in advance ensures the overall wall reads as continuous rather than assembled.
Attachment Methods and Rebar Placement Over the Liner
Because tilt-up panels are horizontal pours, the formliner lies flat against the casting slab and gravity does most of the holding work. Nevertheless, positive attachment prevents the liner from shifting during rebar mat placement, concrete consolidation, and vibrator passes. Several methods work, and the right choice depends on the project's specific conditions.
Attachment Options for Tilt-Up
Walking on the Liner During Rebar Placement
Setting the rebar mat over the liner requires crews to work across the liner surface. On patterns with ribs wider than 1½ inches or relief depths greater than 1½ inches, walking directly on the liner can deform or crush the pattern geometry permanently. The solution is straightforward: lay strips of ¼-inch plywood across the liner surface before the rebar crew begins work.
Thin plywood strips distribute foot and knee loads across multiple ribs rather than concentrating them on individual profile peaks. Importantly, those strips are flexible enough to pull out through the rebar mat before concrete placement begins. Additionally, rebar supports and chair spacers should be plastic or plastic-tipped rather than bare steel. Bare steel chairs rust during the curing period and leave stain marks that transfer directly to the panel face.
The leg spacing of rebar chairs should match the pattern repeat of the formliner wherever possible. Chair legs that fall in the middle of a deep rib cavity instead of on a rib peak can locally deform the liner under concrete load, creating a subtle but visible irregularity in the finished panel surface. Plan chair placement against the liner layout diagram before the rebar mat goes in.
Stripping and Timing: What to Watch Before the Lift
Single-use styrene formliners strip differently from elastomeric liners — and understanding those differences prevents damage to the panel face and to the liner during removal. The goal is clean separation with the pattern detail fully transferred to the concrete surface.
When to Strip
Strip SpecVac liners within 24 hours of the pour whenever possible, and always at a 90-degree angle to the concrete surface. Pulling the liner parallel to the surface — or delaying stripping past 24 hours — increases the bond between the liner and the concrete face and raises the risk of pulling surface fines out of the panel. Consistency in strip timing also matters. When project conditions force some panels to strip early and others late, the surface finish can vary noticeably between the two groups.
Fractured Fin Patterns: Extra Care Required
Fractured fin and ribbed patterns with sharp, deep fins require particular care at stripping. The thin concrete fins that form between the liner ribs are structurally vulnerable before the concrete reaches adequate strength. Consequently, avoid stripping these patterns before the panel has reached the specified compressive strength. Additionally, strip from the corner rather than pulling from the center — starting at a corner and peeling progressively reduces the peel force required and minimizes the risk of fin damage.
The Lift: Don't Rush It
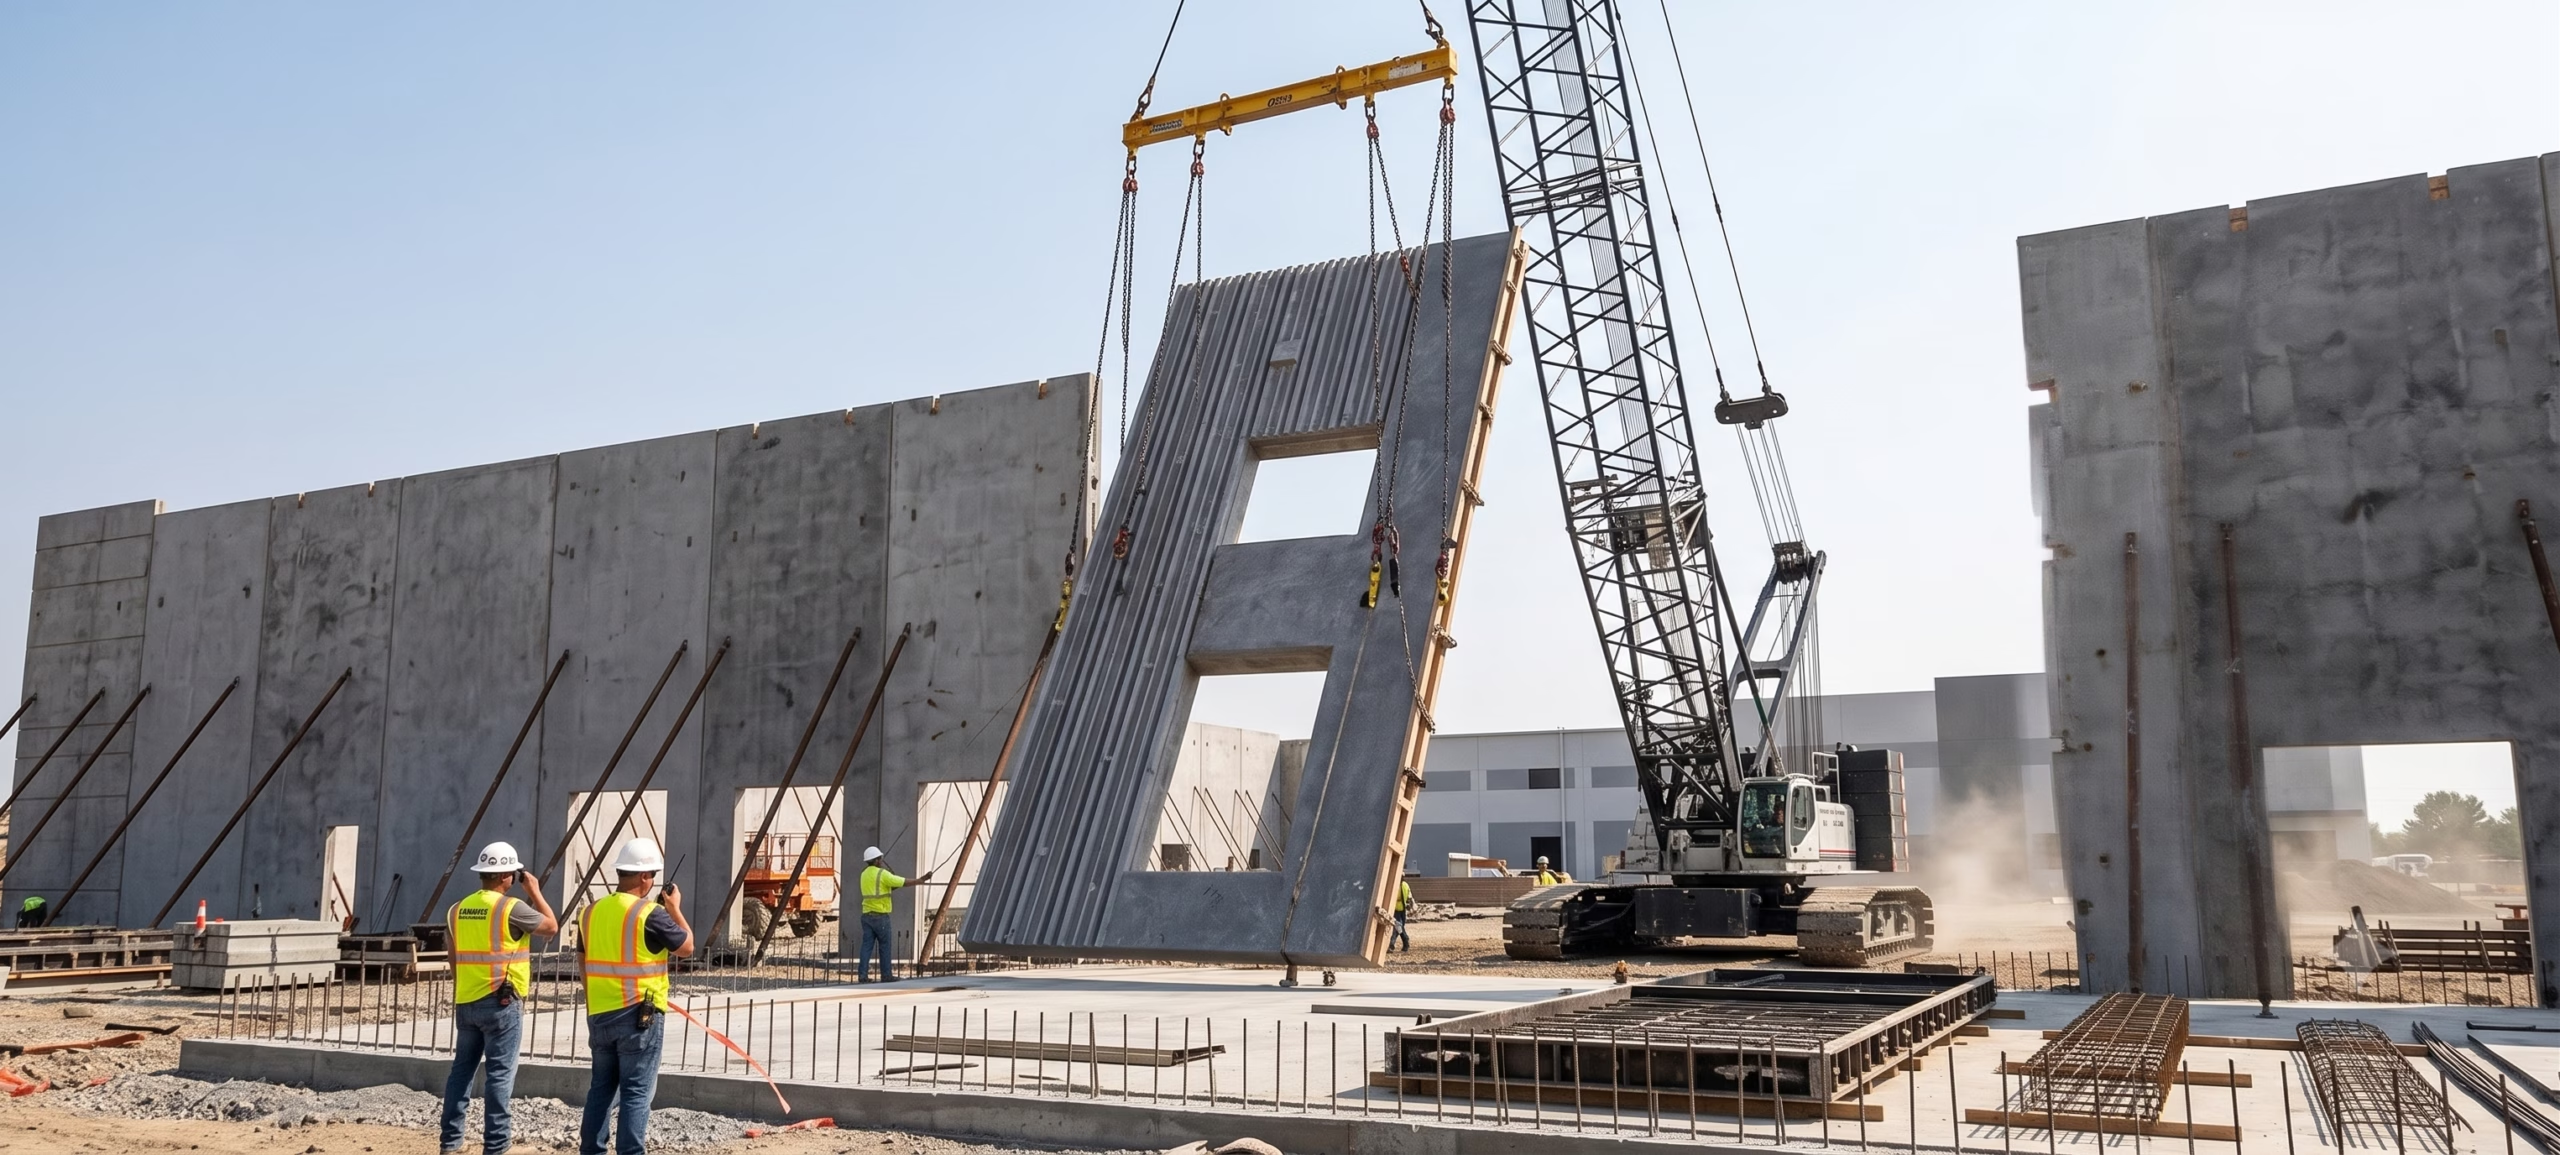
Avoid lifting panels until the concrete reaches the specified compressive strength — typically a minimum of 3,000 psi, though project specifications may require more. Lifting before adequate strength is achieved risks cracking the panel at the lift point or damaging surface texture features near the lifting inserts.
Moreover, the bond breaker suction between the panel and the casting slab adds an initial load spike at the moment of separation. That spike, on top of the panel's dead weight, applies peak stress to the lifting inserts and the surrounding concrete. Adequate strength at lift is therefore non-negotiable, regardless of schedule pressure.
Season Ordering and Lead Time: Why Spring Timing Punishes Late Orders
Spring is when tilt-up construction volume surges across North America. Demand rises sharply as weather opens up, permit timelines resolve, and project owners push to get buildings underway. That demand spike hits formliner supply directly — and contractors who treat liner ordering as a last-step procurement task often find themselves waiting on material while their casting slab sits ready.
Standard vs. Custom Pattern Lead Times
Standard SpecVac patterns — ribbed, fluted, stone, and wood grain profiles already in production — ship on standard lead times and teams can typically place them even with moderate advance notice. Custom patterns, however, are a different situation. Any pattern requiring CNC master mold development, unique panel sizing, or project-specific modifications involves production time that must be accounted for in the project schedule.
Specifically, custom SpecVac patterns go through the same digital design and master mold process as any custom formliner program. Therefore, architects and contractors specifying custom tilt-up textures should initiate the formliner conversation at design development — not at bidding. Waiting until a construction permit is in hand to order a custom pattern means weeks of production lead time compress directly into the critical path.
Quantities and Waste Factors
Ordering formliner quantity for a tilt-up project requires accounting for waste from field cutting. On a project with a high proportion of small panels, complex blockout configurations, or irregular panel shapes, cutting waste can run 15–25% above net panel face area. Accordingly, base quantity orders on gross panel face area plus your expected waste factor — not on net coverage calculations.
Additionally, order pattern alignment material — extra liner for managing seam placement and pattern continuation at panel joints — as part of the initial order. Returning to the supplier for a small supplemental order mid-project introduces delay. It also risks receiving material from a different production run with subtle color or texture variation.
Confirm pattern specification with the architect before ordering — standard vs. custom, pattern repeat, and relief depth all affect lead time and cost.
Calculate gross quantities including a 15–25% waste factor for cutting, plus alignment material for seam management at panel joints.
Place custom pattern orders early — initiate the design conversation at design development, not at permit issuance.
Verify shipping destination and site access for large liner deliveries — SpecVac panels ship flat in large quantities and require adequate staging area at the casting slab site.
How Spec Formliners Supports Tilt-Up Season
With manufacturing in Santa Ana, CA and St. Clair, MO, Spec Formliners positions SpecVac inventory for fast turnaround on both coasts. Standard patterns ship efficiently to tilt-up projects across the continental United States and Canada — and our design team works with contractors and architects from pattern selection through job-site support to make every panel season run cleanly.
Planning a Tilt-Up Season? Let's Get Your Liner Order Right.
Talk to our team about SpecVac patterns, quantities, lead times, and any custom texture requirements — before your casting slab is ready and waiting.